How to Photograph Rugby and Get Great Action Photos

I wrote this because there is not much on how to photograph rugby. I discovered this when a coach asked me to photograph a couple of high school level games. It is a sport I knew nothing about and thought I better brush up. One needs to generally understand the game to get into the flow of anticipating and capturing great action shots. Just like famous photographer Wayne Gretzky frequently said, it is best to look where the ball is going to be rather than where it is. He also said, you miss 100% of the shots without a ball in it. Easy to do when they are only allowed to pass the football backwards and you didn’t know that!
The first step is to enroll in the University of YouTube and watch a couple of basic 2 minute videos on how the game is played. When I found Rugby for Beginners: An Idiot’s Guide, I knew I was in the right place. https://youtu.be/BAf9pxOysY0. Then I found this short Wiki-how How to Play Rugby at https://youtu.be/Q8bdqMeuIiM. Plenty more tutorials on Rugby will come up if you want to dig a little deeper and learn what are tries, rucks and scrums. The Beginner’s Guide to Rugby-How to Play Rugby by James Haskell is about 20 minutes and found here https://youtu.be/F22A_V77Tic.
Ok, so now you have an idea of how the game is played and here’s how to get the best photos.
Gear: If you have two camera bodies, use them. Put a 70-200 zoom on one and something stronger on the other, like up to a 500mm. Using a tripod or monopod for the heavier lens will help keep you from reaching for the Advil later.
Settings: Shoot wide open, which is a small F stop. Like F2.8 or F5.6, for example. This will blur the background and allow you to shoot at a faster shutter speed. If you have a lot of sunlight go with 1/ 1000 of a second but otherwise 1/800th of a second typically works. I like to shoot Raw so I have the most information when post processing. Use auto-white balance because the camera typically does a great job and you can adjust it later in post processing if needed. Auto-ISO will help accommodate for changing lighting conditions. I tend to shoot in manual mode but you can shoot in shutter priority because you want sharp photos above all else. Shutter settings would be a continuous high so that your camera sounds like a machine gun when shooting the action. You can delete the bad ones later. Experiment with focus settings. I typically will use single point auto focus because there is just so many people/objects coming in and out of the frame, a large focusing point can grab on to the wrong thing. I will place the focusing box slightly below the center line so I can lock on to the torso. Back button focus: It is worth learning this so you can be focusing with your thumb on the back of the camera tracking the action and using your index finger to release the shutter. Focusing is a skill which takes experimentation and practice. There is lots of help on line for your particular camera settings.
Positioning: There is so much action in Rugby, you can stand anywhere around the pitch perimeter (at safe distance) and get great shots. I tend to position myself closer to the opponents try-line so I can get more front-on photos and tries. Feel free to reposition yourself during the game especially to get any sunlight in the players faces.
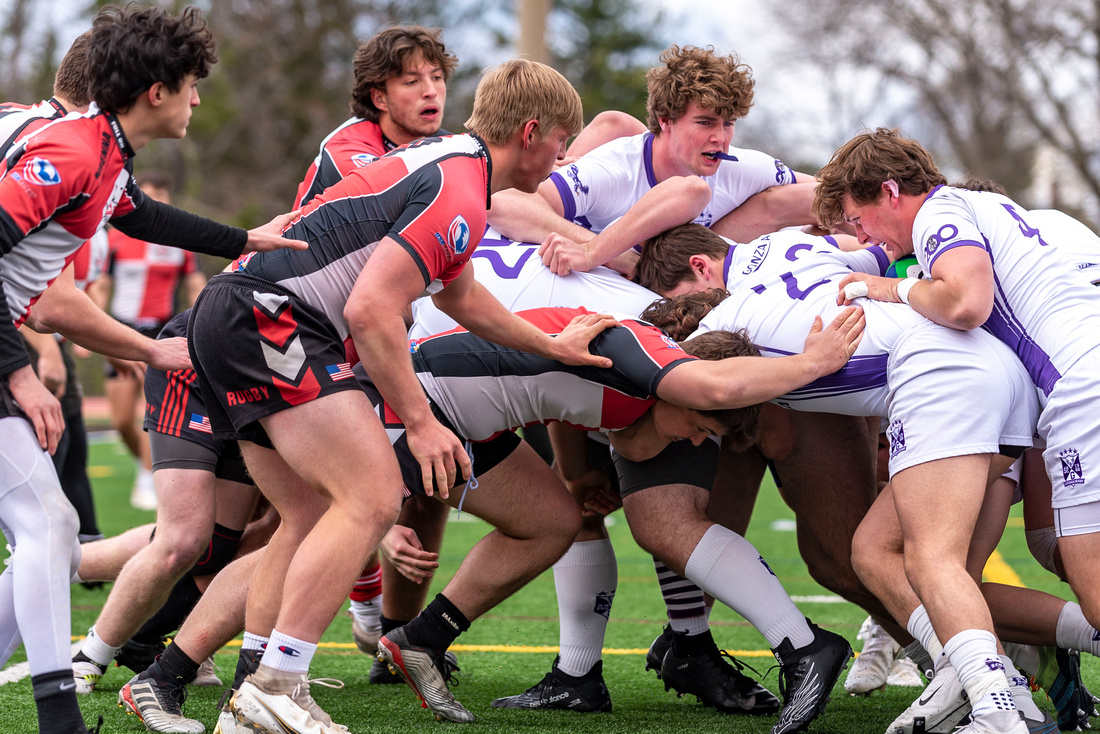
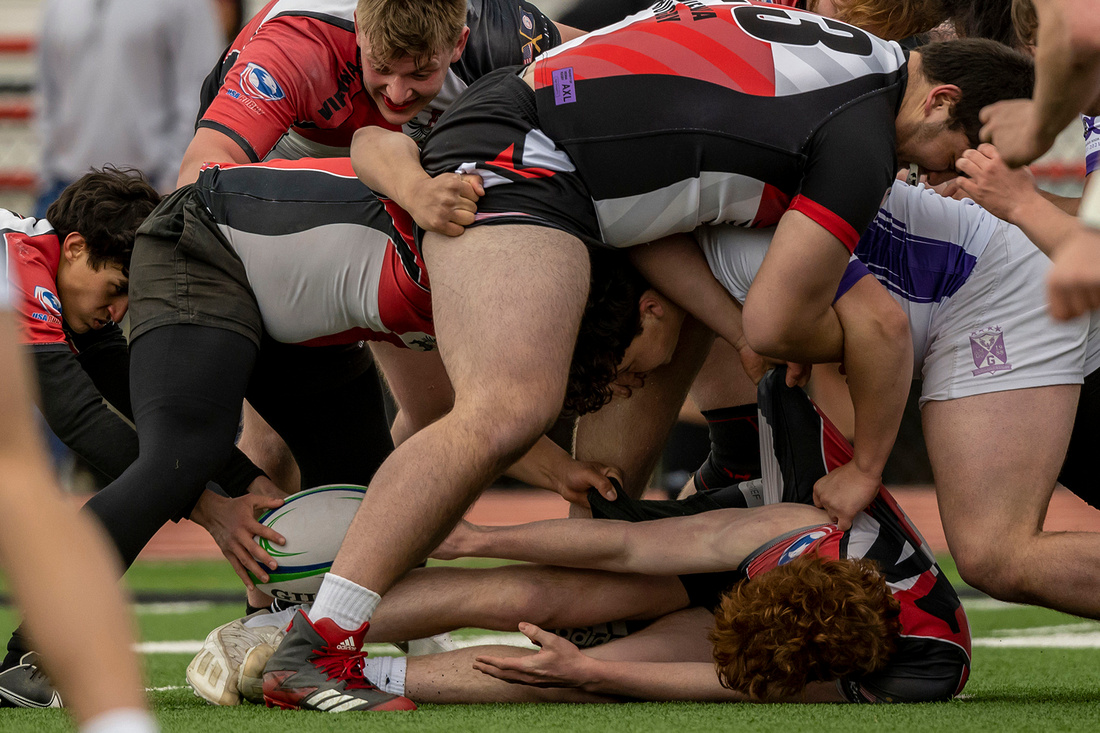
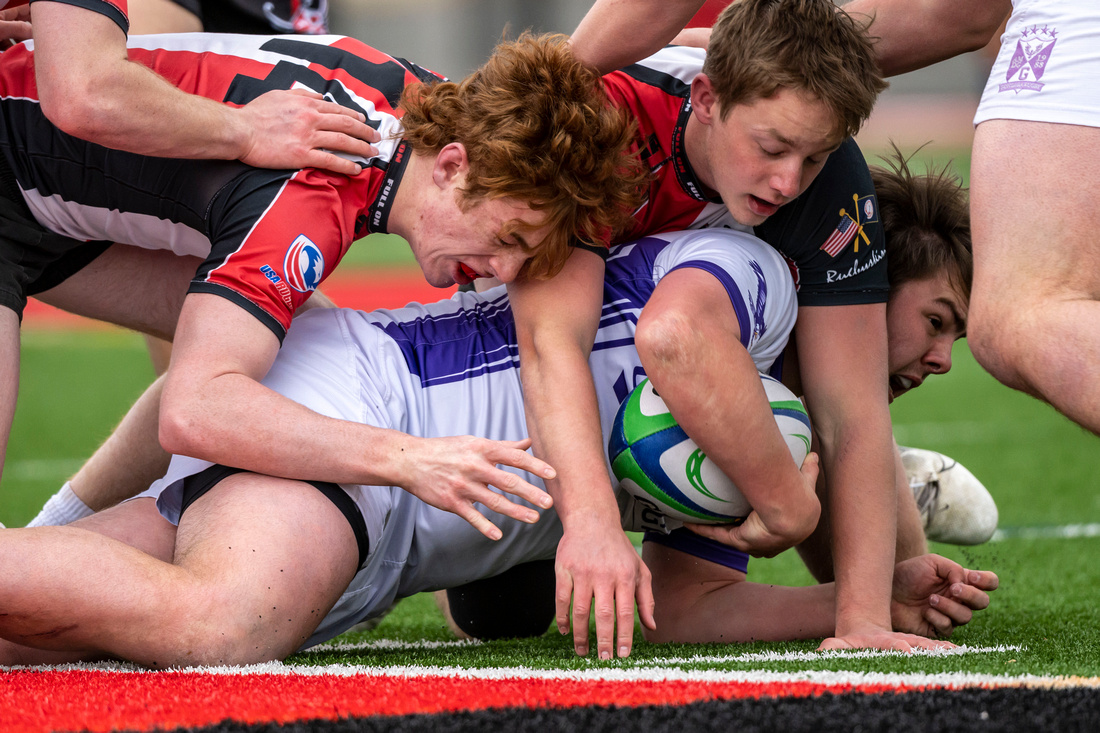
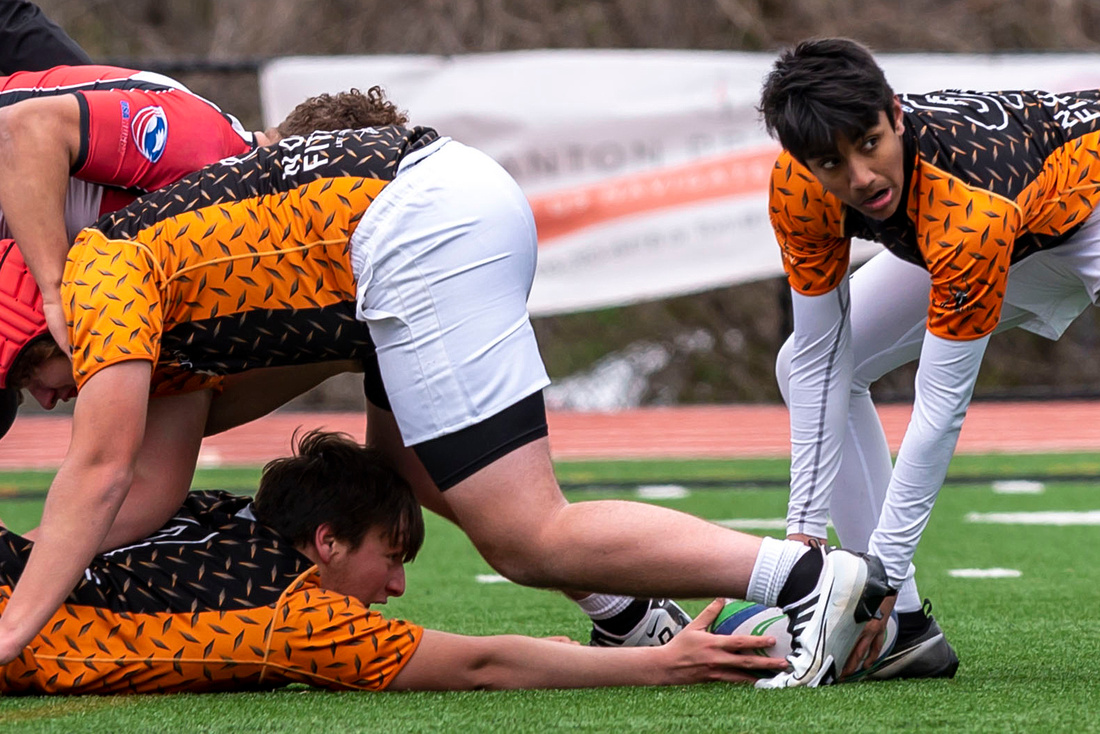
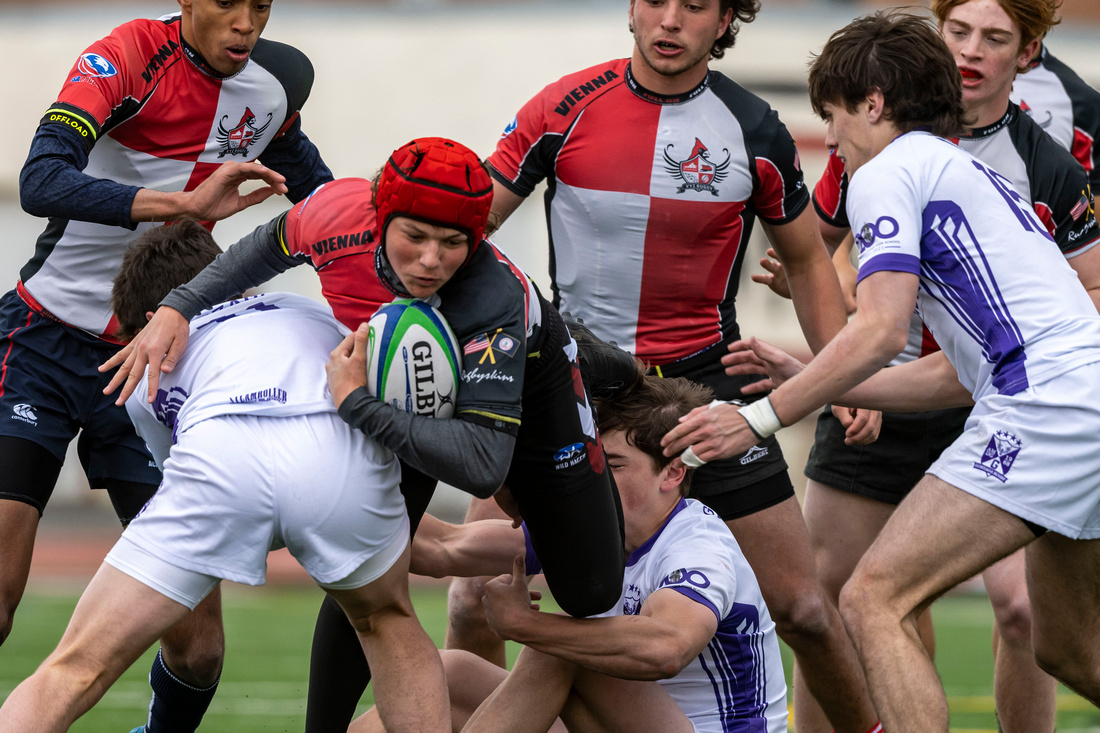
Strategy: First and foremost you want your action shots to have a ball in the picture. In one of the videos I watched, the narrator said, a rugby photograph without a ball just looks like an assault. So following Gretzky’s advice, get a feel for where the ball is going and anticipate it. Try also to anticipate action and trip the shutter just before something happens because if you see the action your camera missed it. You can get some great shots without the ball, like the emotional reactions to scoring and penalties and side-line coaching activity. Actions shots should have a ball in it. Finally, there is one more tactic that will give you the most powerful images: Get low. Sounds simple but many photographers do not think to do this or avoid it because it is frankly physically uncomfortable. First, getting low makes your subject look more powerful and imposing. In rugby, there is frequently action on or near the ground. Rucks and scrums have lots of ground level action with the ball and facial expressions. Shooting at ground level inserts your viewer into that action.
You are all set! Now go sit on your butt and take great rugby photos!